Introduction
The purpose of this lab was to connect concepts of JavaScript, HTML, and CSS learned in previous labs and access ESRI’s ArcGIS JavaScript Application Programming Interface (API). The API allows the programmer to use and customize various web GIS components from templates. In this case specifically, these templates utilize ESRI frameworks- meaning the functioning components (ie. basemaps, symbols, and even pre-packaged web services) in the resulting web pages are designed by ESRI.
Methods
Part 1:
To start this lab, a new HTML document was created. This HTML code set up a basic GIS service webpage, giving the site a title ("Create a Map"), URL, and an ESRI basemap as the content (figure 1).
To start this lab, a new HTML document was created. This HTML code set up a basic GIS service webpage, giving the site a title ("Create a Map"), URL, and an ESRI basemap as the content (figure 1).
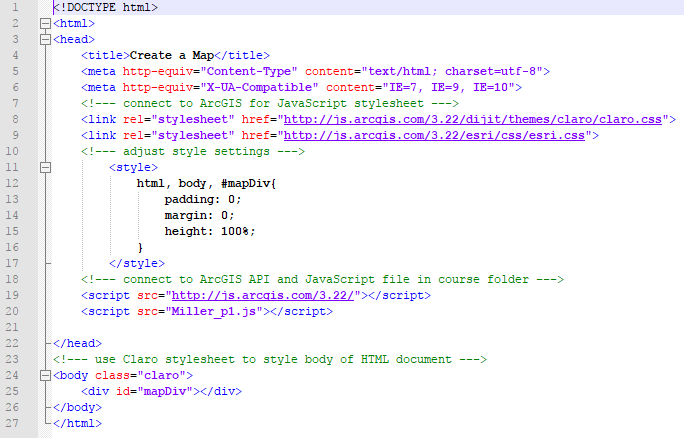 |
| Figure 1: "Create a Map" HTML document. |
Next, a new JavaScript document was created (figure 2). This script established access to various web app components from ESRI JavaScript API, used components from the Dojo library, and set the extent for the basemap. This script, and it's components, works by referencing the file name in the original HTML code (see "Miller_p1.js" in figure 1).
 |
| Figure 2: "Create a Map" JavaScript document. |
In the next part of this lab, an HTML and JavaScript document were set up in the same way as in part 1. This time, however, a pre-packaged web service was accessed within the code using a variety of functions within the JavaScript document. In figure 3, the HTML code for this section is shown.
 |
| Figure 3: "Custom Info Window" HTML document. |
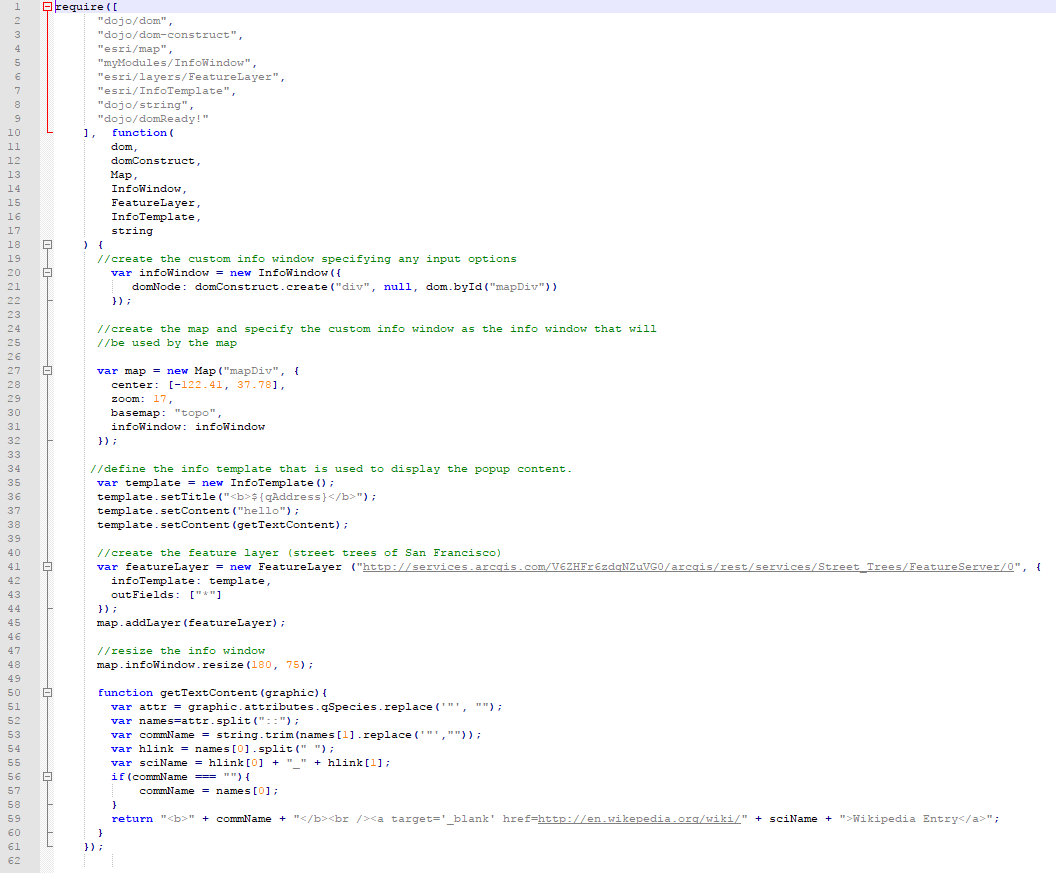 |
| Figure 4: "Custom Info Window" JavaScript document. |
Part 2 - Section II
Using a pre-packaged web service to practice accessing them in HTML is just that- good practice. For the next section of this part of the lab, a new web service was produced, published, and then accessed within the JavaScript document (figure #). To start, a shapefile containing school locations in Eau Claire county was brought into ArcMap and symbolized. The shapefile used didn't contain the addresses of the schools, however, a separate data table within the project folder did. The tables of the two layers were joined by school name (figure 5).
 |
| Figure 5: Table join in ArcMap. |
 |
| Figure 6: Export data to new shapefile. |
Using the JavaScript document created in the previous section as a template, a copy was made and edited to fit the requirements for this webpage. In figure 7, the new JavaScript document is shown.
 |
| Figure 7: Eau Claire Schools JavaScript document. |
 |
| Figure 8: Eau Claire Schools HTML document. |
For the last part of this lab, a routing application was developed. To begin, a new HTML document was created (figure 9); setting up the script in a similar way to previous HTML documents in this lab. For this web page the ESRI .css stylesheet "claro" was used to style the web page.
 |
| Figure 9: Simple Routing HTML document. |
 |
| Figure 10: Simple Routing JavaScript requirements section. |
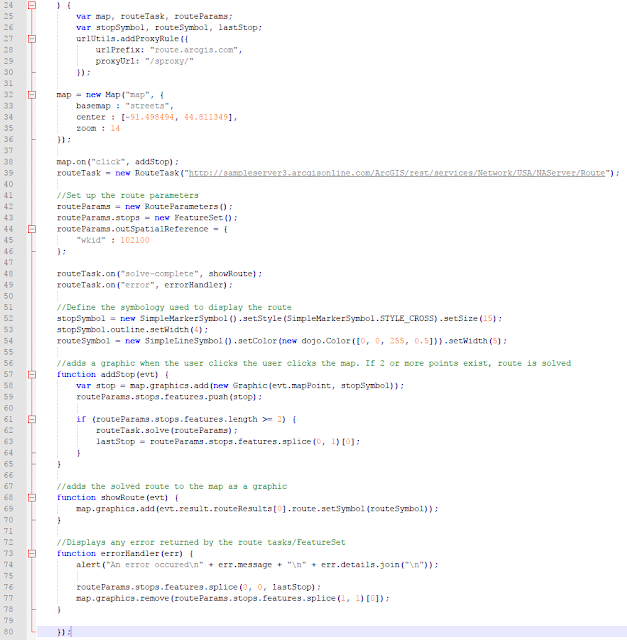 |
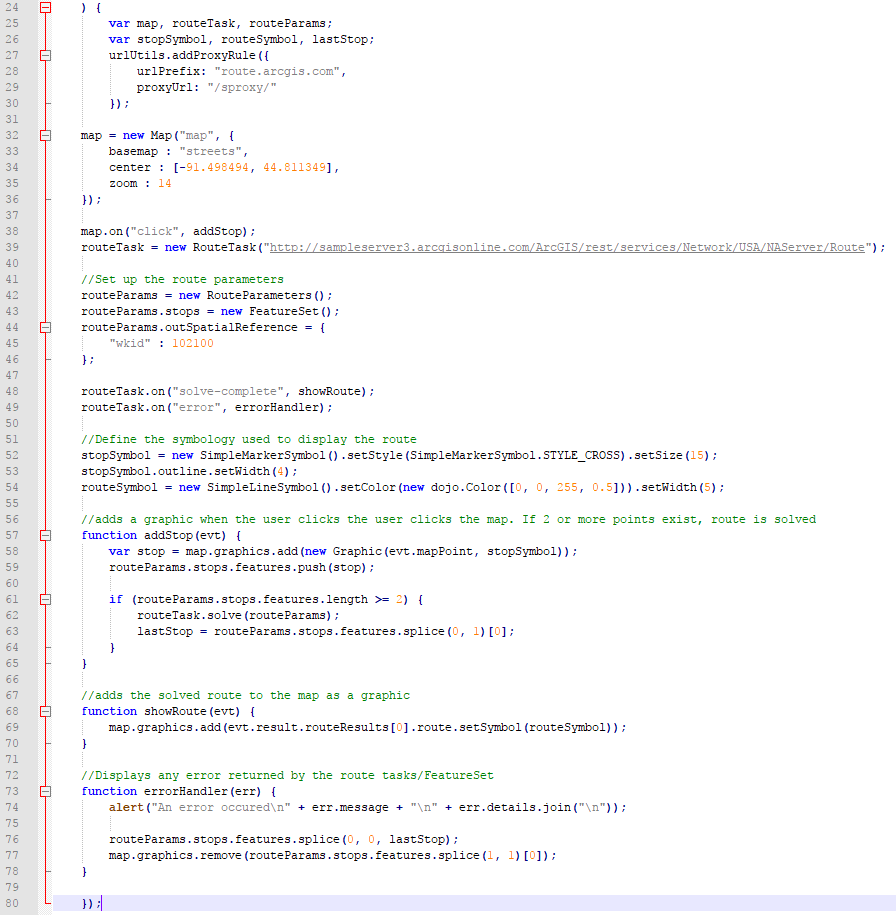
| Figure 11: Simple Routing JavaScript continued. |
As shown in figure 11, the server where the routing web service is stored was referenced in the routeTask variable, the point and line symbols were configured, and an error message was set up among other web page functions.
Results
Part 1
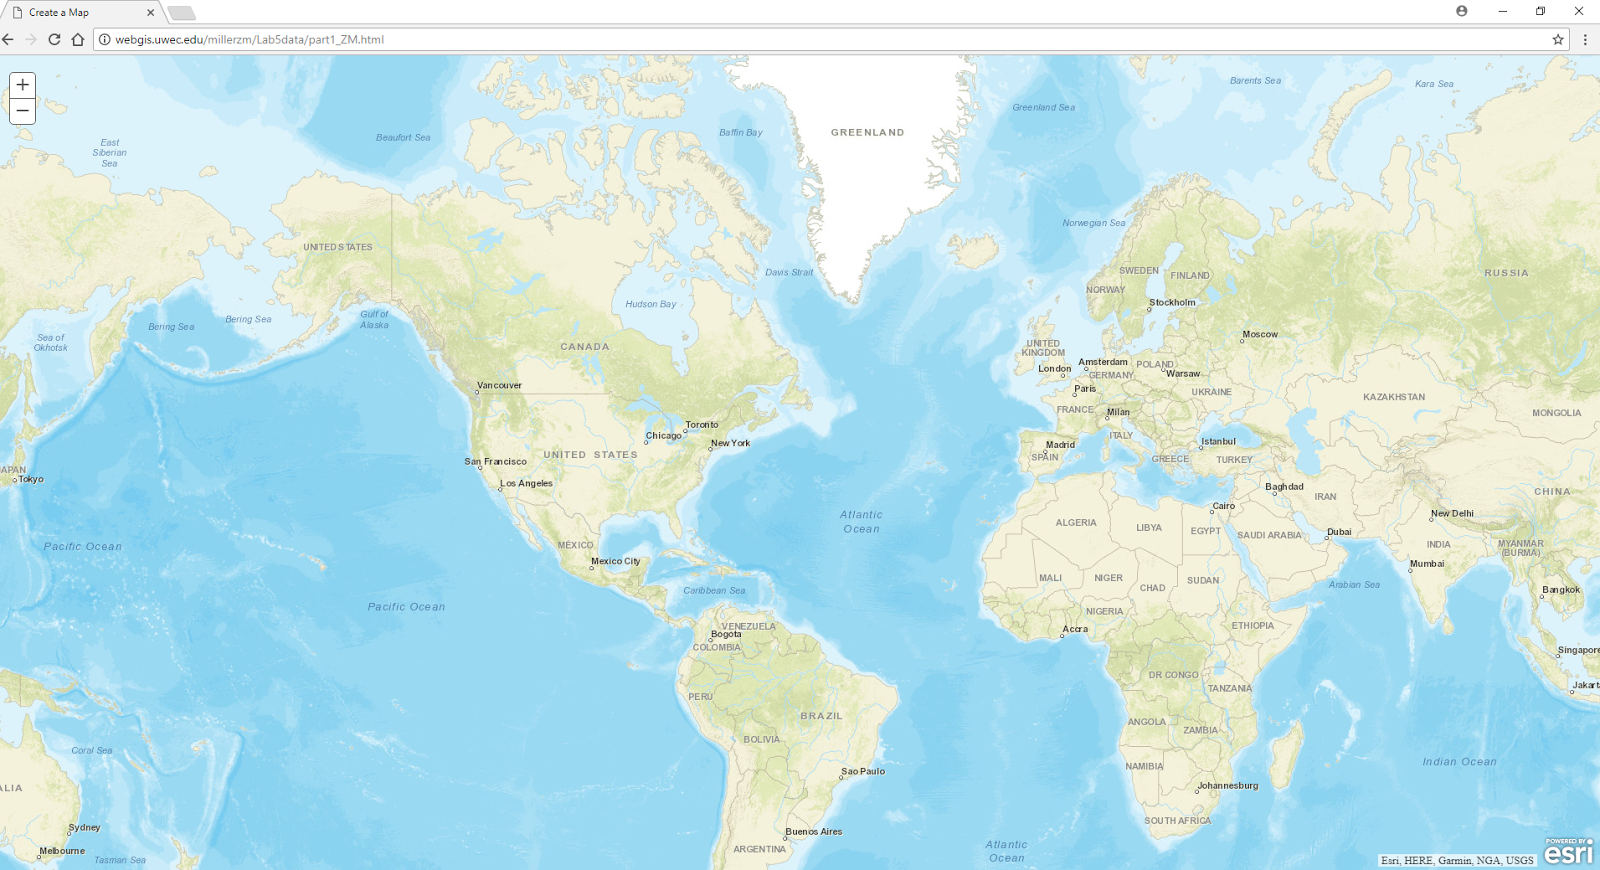 |
| Figure 12: Create a Map webpage. |
 |
| Figure 13: Custom Info Window webpage. |
 |
| Figure 14: Eau Claire Schools webpage. |
 |
| Figure 15: Simple Routing webpage. |
While this lab was certainly difficult, I thought it did a good job of exposing me to different modules, libraries, APIs, and the overall capabilities of using JavaScript, HTML, and CSS to develop web pages. Most of the problems I ran into while completing this lab were due to minor spelling or symbol errors, however, this is the nature of working with programming languages. Lastly, I found this exercise useful in expanding my knowledge of various code components that make up functions within a web page. For example, calling the various dojo functions within the require statement in the JavaScript codes is essential to defining each function's parameters later in the script.
Sources
EC_Schools feature class was obtained from MapCruzin.com at: http://www.mapcruzin.com/geographic-names-shapefiles/#School
EC_Schools_Address was assembled by GEOG 455 class, fall 2013. Widget_infowindow files were provided by Esri at:
https://developers.arcgis.com/javascript/jssamples.html
A reference to explain cardinality was used:
https://en.wikipedia.org/wiki/Cardinality_(data_modeling)
Source code provided by:
Dr. Cyril Wilson, GEOG 455: Web GIS, Fall 2017
No comments:
Post a Comment